In addition to providing a single theme for your html output, you may also provide a light and dark theme. For example:
format:theme:light: flatlydark: darkly
When providing both a dark and light mode for your html output, Quarto will automatically create a toggle to allow your reader to select the desired dark or light appearance.
Dark Mode
Setting the above themes in your _quarto.yml results in both a dark and light version of your output being available. For example:
Flatly Themed Output
Darkly Themed Output
Theme Options
You can do extensive customization of themes using Sass. Bootstrap defines over 1,400 Sass variables that control fonts, colors, padding, borders, and much more. You can see all of the variables here:
Sass is a CSS extension (provides additional features, like variables)
Sass is a CSS preprocesser (converts Sass code into standard CSS, which is a critical step because browsers can’t interpret Sass and can interpret CSS)
Sass Reduces Repetition
Sass extends existing CSS features in a number of exciting ways, but importantly reduces repetition.
For example, let’s say you’re building a website / web page that uses three colors:
You might imagine how often you’ll need to type those HEX codes out as you developing your stylesheet…it can get annoying rather quickly.
Sass Reduces Repetition
Or just look at my website:
Example stylesheet (.scss)
/*-- scss:defaults --*/// Headings$headings-color: #E84E0F!default;// Text colour$body-color: #2A2E46!default;$body-bg: #eeeeee!default;// Navbar$navbar-bg: #2A2E46!default;$navbar-fg: #eeeeee!default;// hover on navbar.navbar-expand-lg.navbar-nav.nav-link:hover {color: #E84E0F;}.navbar-expand-lg.navbar-nav.nav-link.active {color: #eeeeee;}
Define Sass Variables
Sass allows us to define variables (in the form $var-name: value;) for our colors, which we can reference instead of writing out their HEX codes each time. This makes your stylesheet more readable and easier to update (e.g. only need to update HEX codes in one spot, not multiple!).
Example stylesheet (.scss)
/*-- scss:defaults --*/// define Sass vars $darkblue: #053660;$teal: #147C91;$darkgray: #333333;// use vars in CSS rules (we'll learn more about how to write CSS soon!) h1 { font-color: $darkblue;}.button-styling {background: $teal;color: $darkblue; border-color: $darkgray;}
Note: Sass has two syntaxes – SCSS syntax (.scss), shown above, is the most common. It stands for Sassy Cascading Stylesheets and also the SASS syntax (.sass)
Quarto compiles Sass automatically
Web browsers can interpret CSS (.css) but not Sass (.scss or .sass).
Typically, you’d need to compile (i.e. convert) Sass to CSS, then link the resulting .css file in your HTML.
Lucky for us, Quarto compiles the contents of a .scss file into CSS without any extra steps – all we need to do is link to a .scss file directly in our website’s _quarto.yml.
Create .scss File
Create a .scss file in your repo’s root directory using the Terminal:
Bash or zsh
touch styles.scss
CMD
type nul > styles.scss
PowerShell
ni styles.scss
Add the /*-- scss:defaults --*/ region decorator to the top of styles.scss (required by Quarto) – you’ll write all your Sass variables underneath this.
styles.scss
/*-- scss:defaults --*/
Adding the region decorator as written above is critical! Quarto won’t recognize your .scss file without it.
Create .scss File
Apply your styles.scss file to your website using the theme option:
_quarto.yml
format:html:theme:- cosmo- styles.scsstoc:truepage-layout: full
Note: I’ve also removed the css: styles.css option that was included by default, since I’ll be writing all my sass and css in this single styles.scss file
Define colors variables
I like to start by defining the colors I want to use throughout my site. For example:
You can also define values with units, e.g. $my-font-size: 25px;.
Note: In .scss files, // denote single line comments. Multi-line comments start with /* and end at the next */.
Define Quarto Sass variables
Quarto provides a list of pre-defined Sass Variables, which control the appearance of various website elements and that can be specified within .scss files. We can assign our newly-minted color variables as values to Quarto Sass variables to easily update things like the background color, navbar & footer colors, hyperlink color, and more.
Define Quarto Sass variable
Use the syntax $quarto-var: $your-color-var;.
styles.scss
/*-- scss:defaults --*/// Colors$dark-green: #858E79;$light-green: #D1D9CE;$cream: #FDFBF7;$gray: #64605f;$purple: #9158A2;$orange: #ad7237;// Base document colors$navbar-bg: $cream; // navbar$navbar-fg: $dark-green; // navbar foreground elements$navbar-hl: $purple; // highlight color when hovering over navbar links$body-bg: $light-green; // page background $body-color: $gray; // page text $footer-bg: $cream; // footer $link-color: $purple; // hyperlinks // Inline code$code-bg: $cream; // inline code background color$code-color: $purple; // inline code text color
Sass Variables
The following Sass Variables can be specified within SCSS files (note that these variables should always be prefixed with a $ and are specified within theme files rather than within YAML options)
Colors
Fonts
Code Blocks
Code Annotation
You can customize the colors used to highlight lines when code annotation is used:
Variable
Notes
$code-annotation-higlight-color
The color used as a border on highlighted lines.
$code-annotation-higlight-bg
The color used for the background of highlighted lines.
Code Copy
You can also customize the colors of the button which appears for code-copy: true with the following variables:
Variable
Notes
$btn-code-copy-color
The color used for the copy button at the top right of code blocks.
$btn-code-copy-color-active
The hover color used for the copy button at the top right of code blocks.
Inline Code
Variable
Notes
$code-bg
The background color of inline code. Defaults to a mix between the body-bg and body-color.
$code-color
The text color of inline code. Defaults to a generated contrasting color against the code-bg.
Table of Contents
Variable
Notes
$toc-color
The color for table of contents text.
$toc-font-size
The font-size for table of contents text.
$toc-active-border
The left border color for the currently active table of contents item.
$toc-inactive-border
The left border colors for inactive table of contents items.
Layout
Variable
Notes
$content-padding-top
Padding that should appear before the main content area (including the sidebar, content, and TOC.
Navigation
Variable
Notes
$navbar-bg
The background color of the navbar. Defaults to the theme’s $primary color.
$navbar-fg
The color of foreground elements (text and navigation) on the navbar. If not specified, a contrasting color is automatically computed.
$navbar-hl
The highlight color for links in the navbar. If not specified, the $link-color is used or a contrasting color is automatically computed.
Navigation
Variable
Notes
$sidebar-bg
The background color for a sidebar. Defaults to $light except when a navbar is present or when the style is floating. In that case it defaults to the $body-bg color.
$sidebar-fg
The color of foreground elements (text and navigation) on the sidebar. If not specified, a contrasting color is automatically computed.
$sidebar-hl
The highlight color for links in the sidebar. If not specified, the $link-color is used.
Navigation
Variable
Notes
$footer-bg
The background color for the footer. Defaults to the $body-bg color.
$footer-fg
The color of foreground elements (text and navigation) on the footer. If not specified, a contrasting color is automatically computed.
Callouts
Variable
Notes
$callout-border-width
The left border width of callouts. Defaults to 5px.
$callout-border-scale
The border color of callouts computed by shifting the callout color by this amount. Defaults to 0%.
$callout-icon-scale
The color of the callout icon computed by shifting the callout color by this amount. Defaults to 10%.
Callouts
Variable
Notes
$callout-margin-top
The amount of top margin on the callout. Defaults to 1.25rem.
$callout-margin-bottom
The amount of bottom margin on the callout. Defaults to 1.25rem.
You also do not need to create a theme entirely from scratch! If you like parts of a pre-built Bootswatch theme, you can modify it by layering on your desired updates using your own custom styles.scss file.
For example, let’s say I love everything about the pre-built cosmo theme, and only want to update the navbar background color to orange. My files might look something like this:
_quarto.yml
format: html: theme:- cosmo- styles.scss toc: false page-layout: full
Our resulting website, which is primarily themed using cosmo, but with a custom orange navbar.
Your Turn
Create a .scss file in your repo’s root directory using the Terminal:
Bash or zsh
touch styles.scss
CMD
type nul > styles.scss
PowerShell
ni styles.scss
Add the /*-- scss:defaults --*/ decorator to the top of styles.scss;
Apply the path to your styles.scss file using the theme option with your theme;
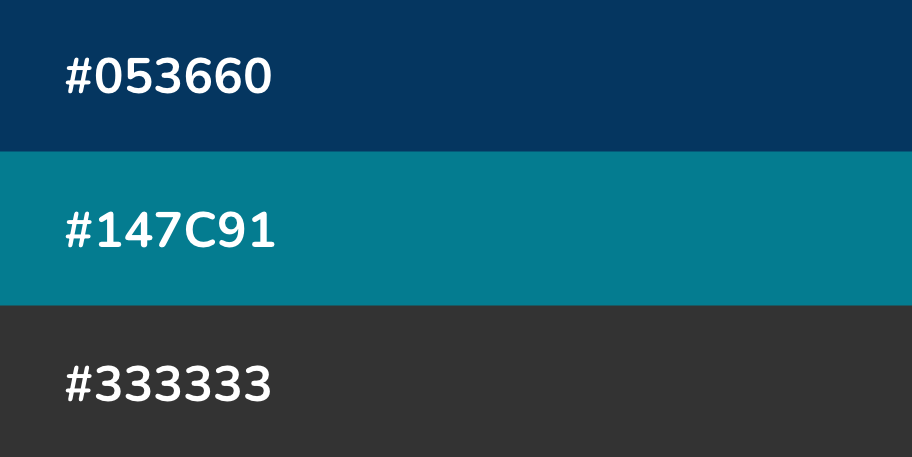
In your styles.scss file, define 3 colours and assign them to the variables:
$navbar-bg:
$navbar-fg:
$body-bg:
10:00
Explore Google Fonts
Fonts are just as important as colour in expressing yourself and your brand. You should absolutely be importing and using a different (more exciting) font family(ies) than the default.
Browse the many available Google fonts at https://fonts.google.com/ and choose 2 fonts. Click on the Filters button in the top left corner of the page to help narrow your choices.
They can easily be applied by following these 3 steps
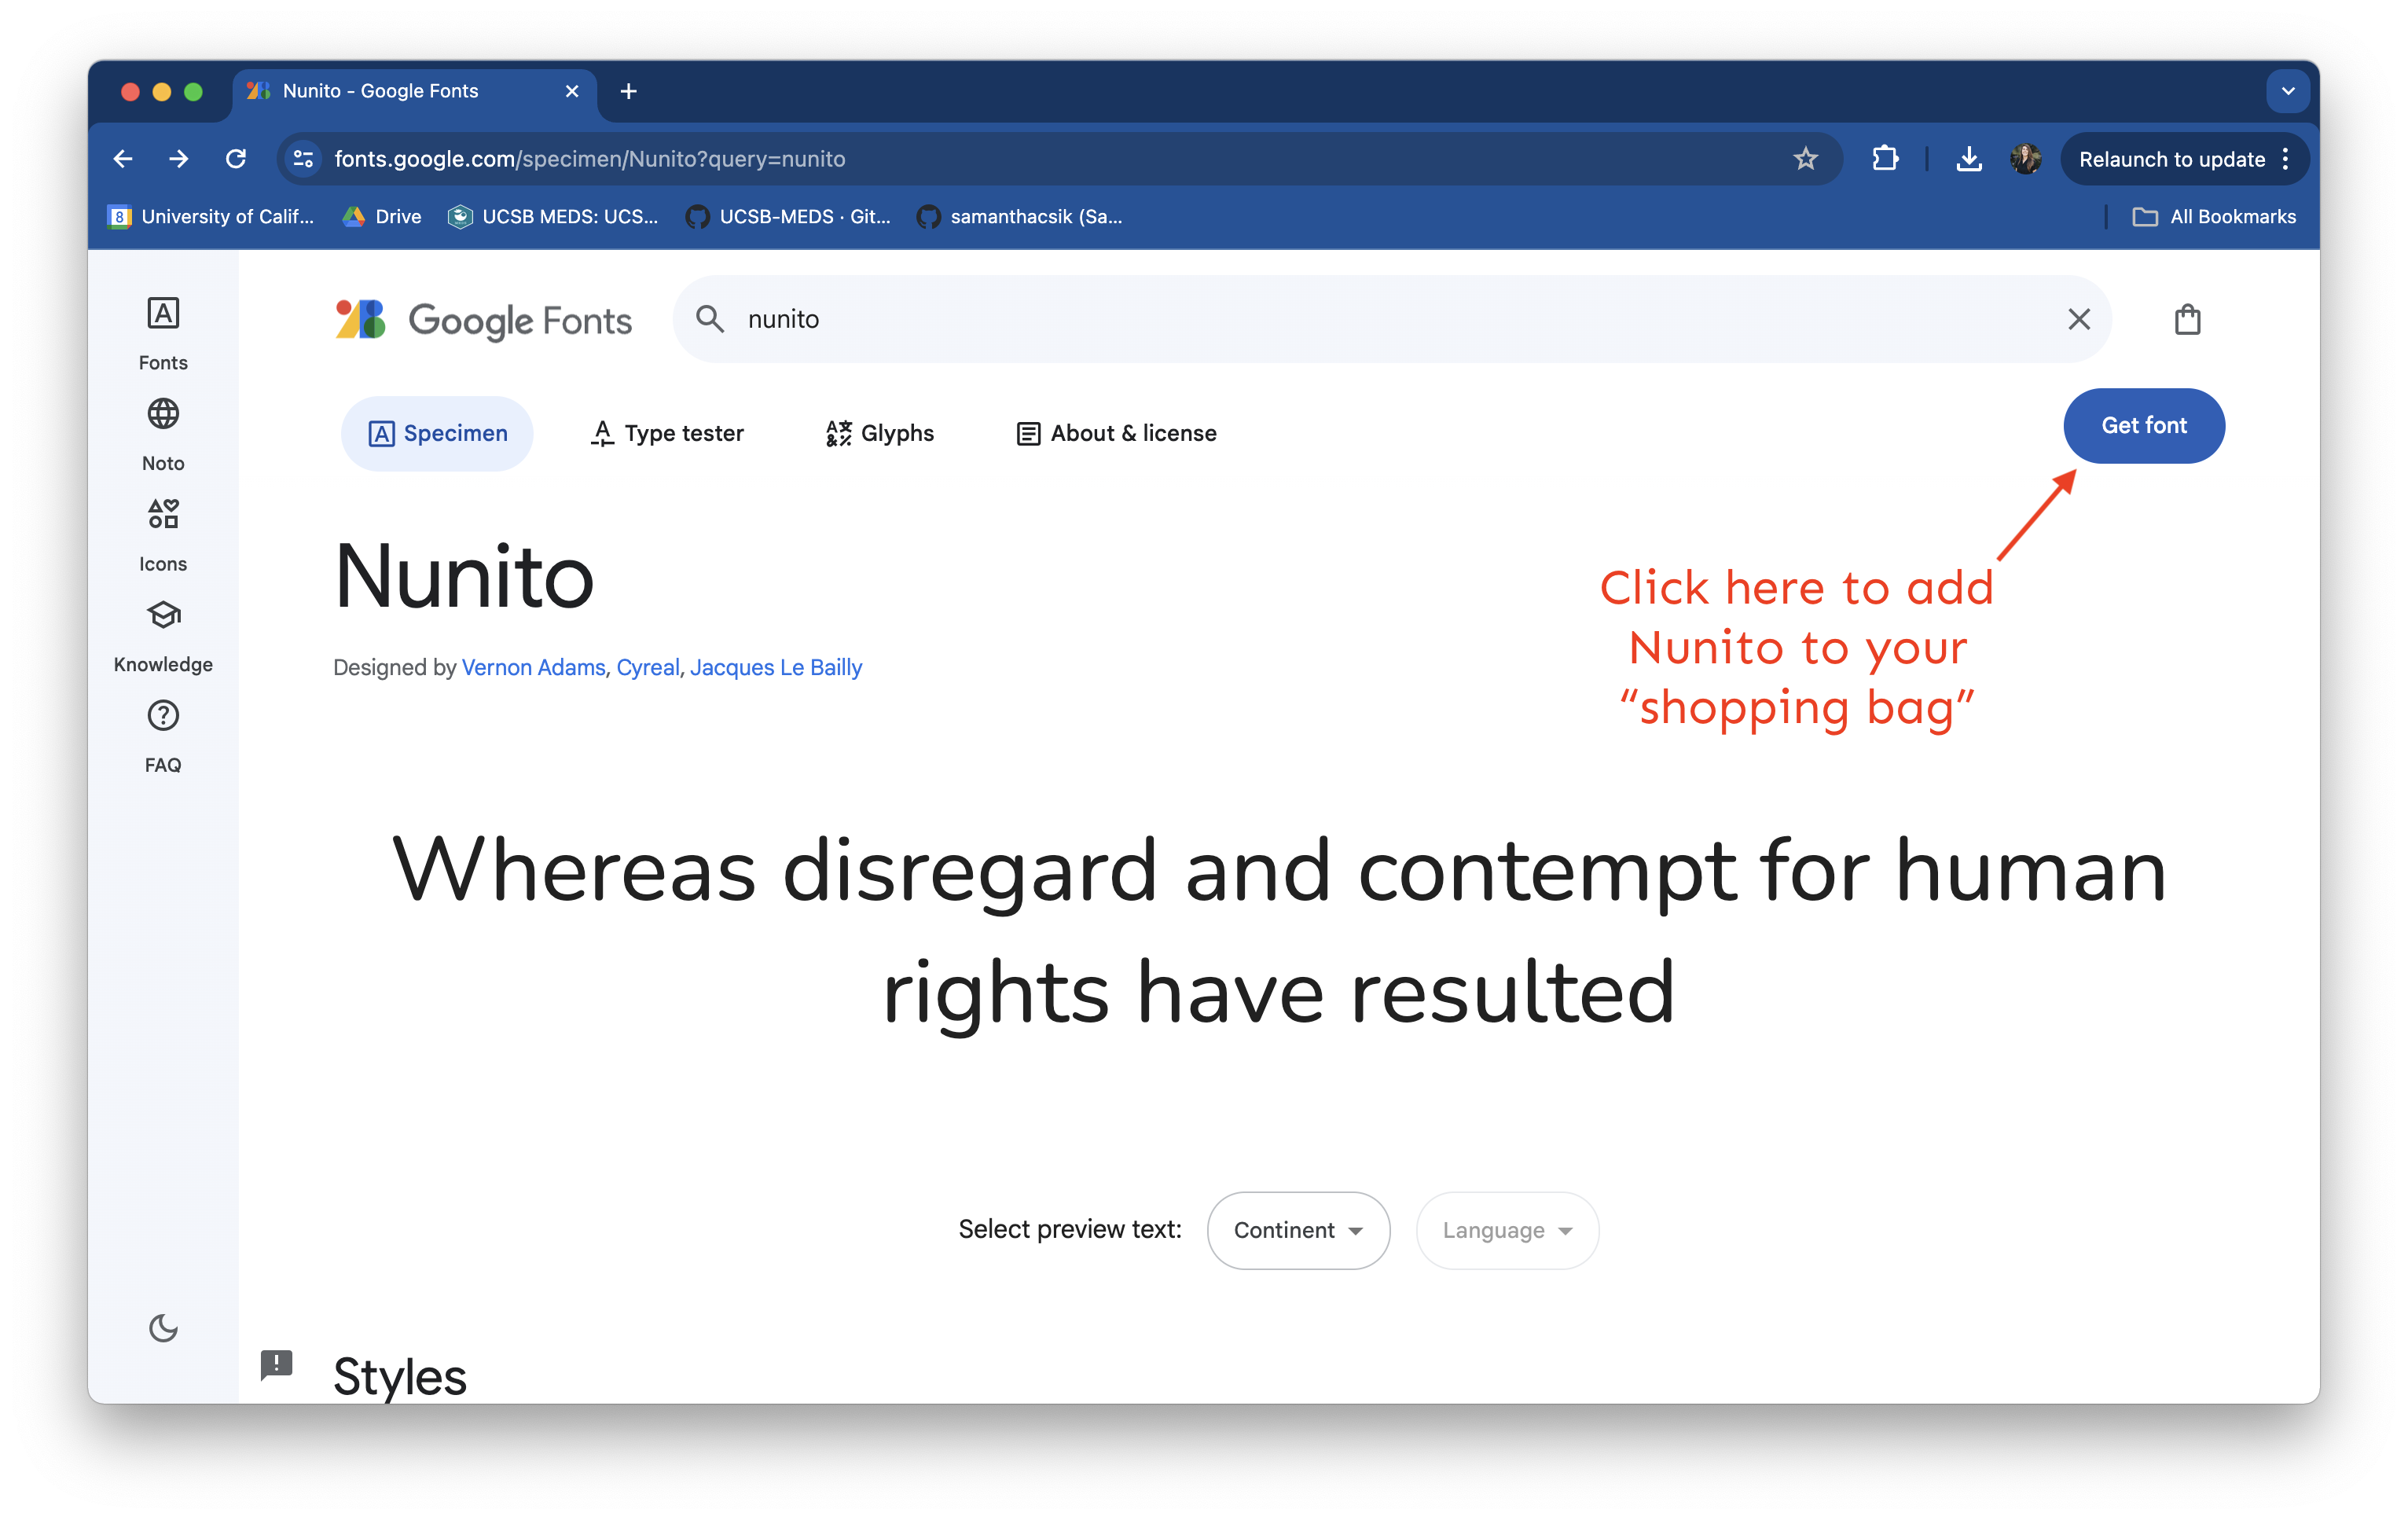
Select Fonts
Select a Google font family by clicking the blue Get Font button in the top right corner of the page, which adds your font family to your “bag.” You can add as many font families to your bag as you’d like to import – here, we select both Nunito and Sen.
Explore the Nunito font family, which is available in a number of styles (i.e. different weights and italic):
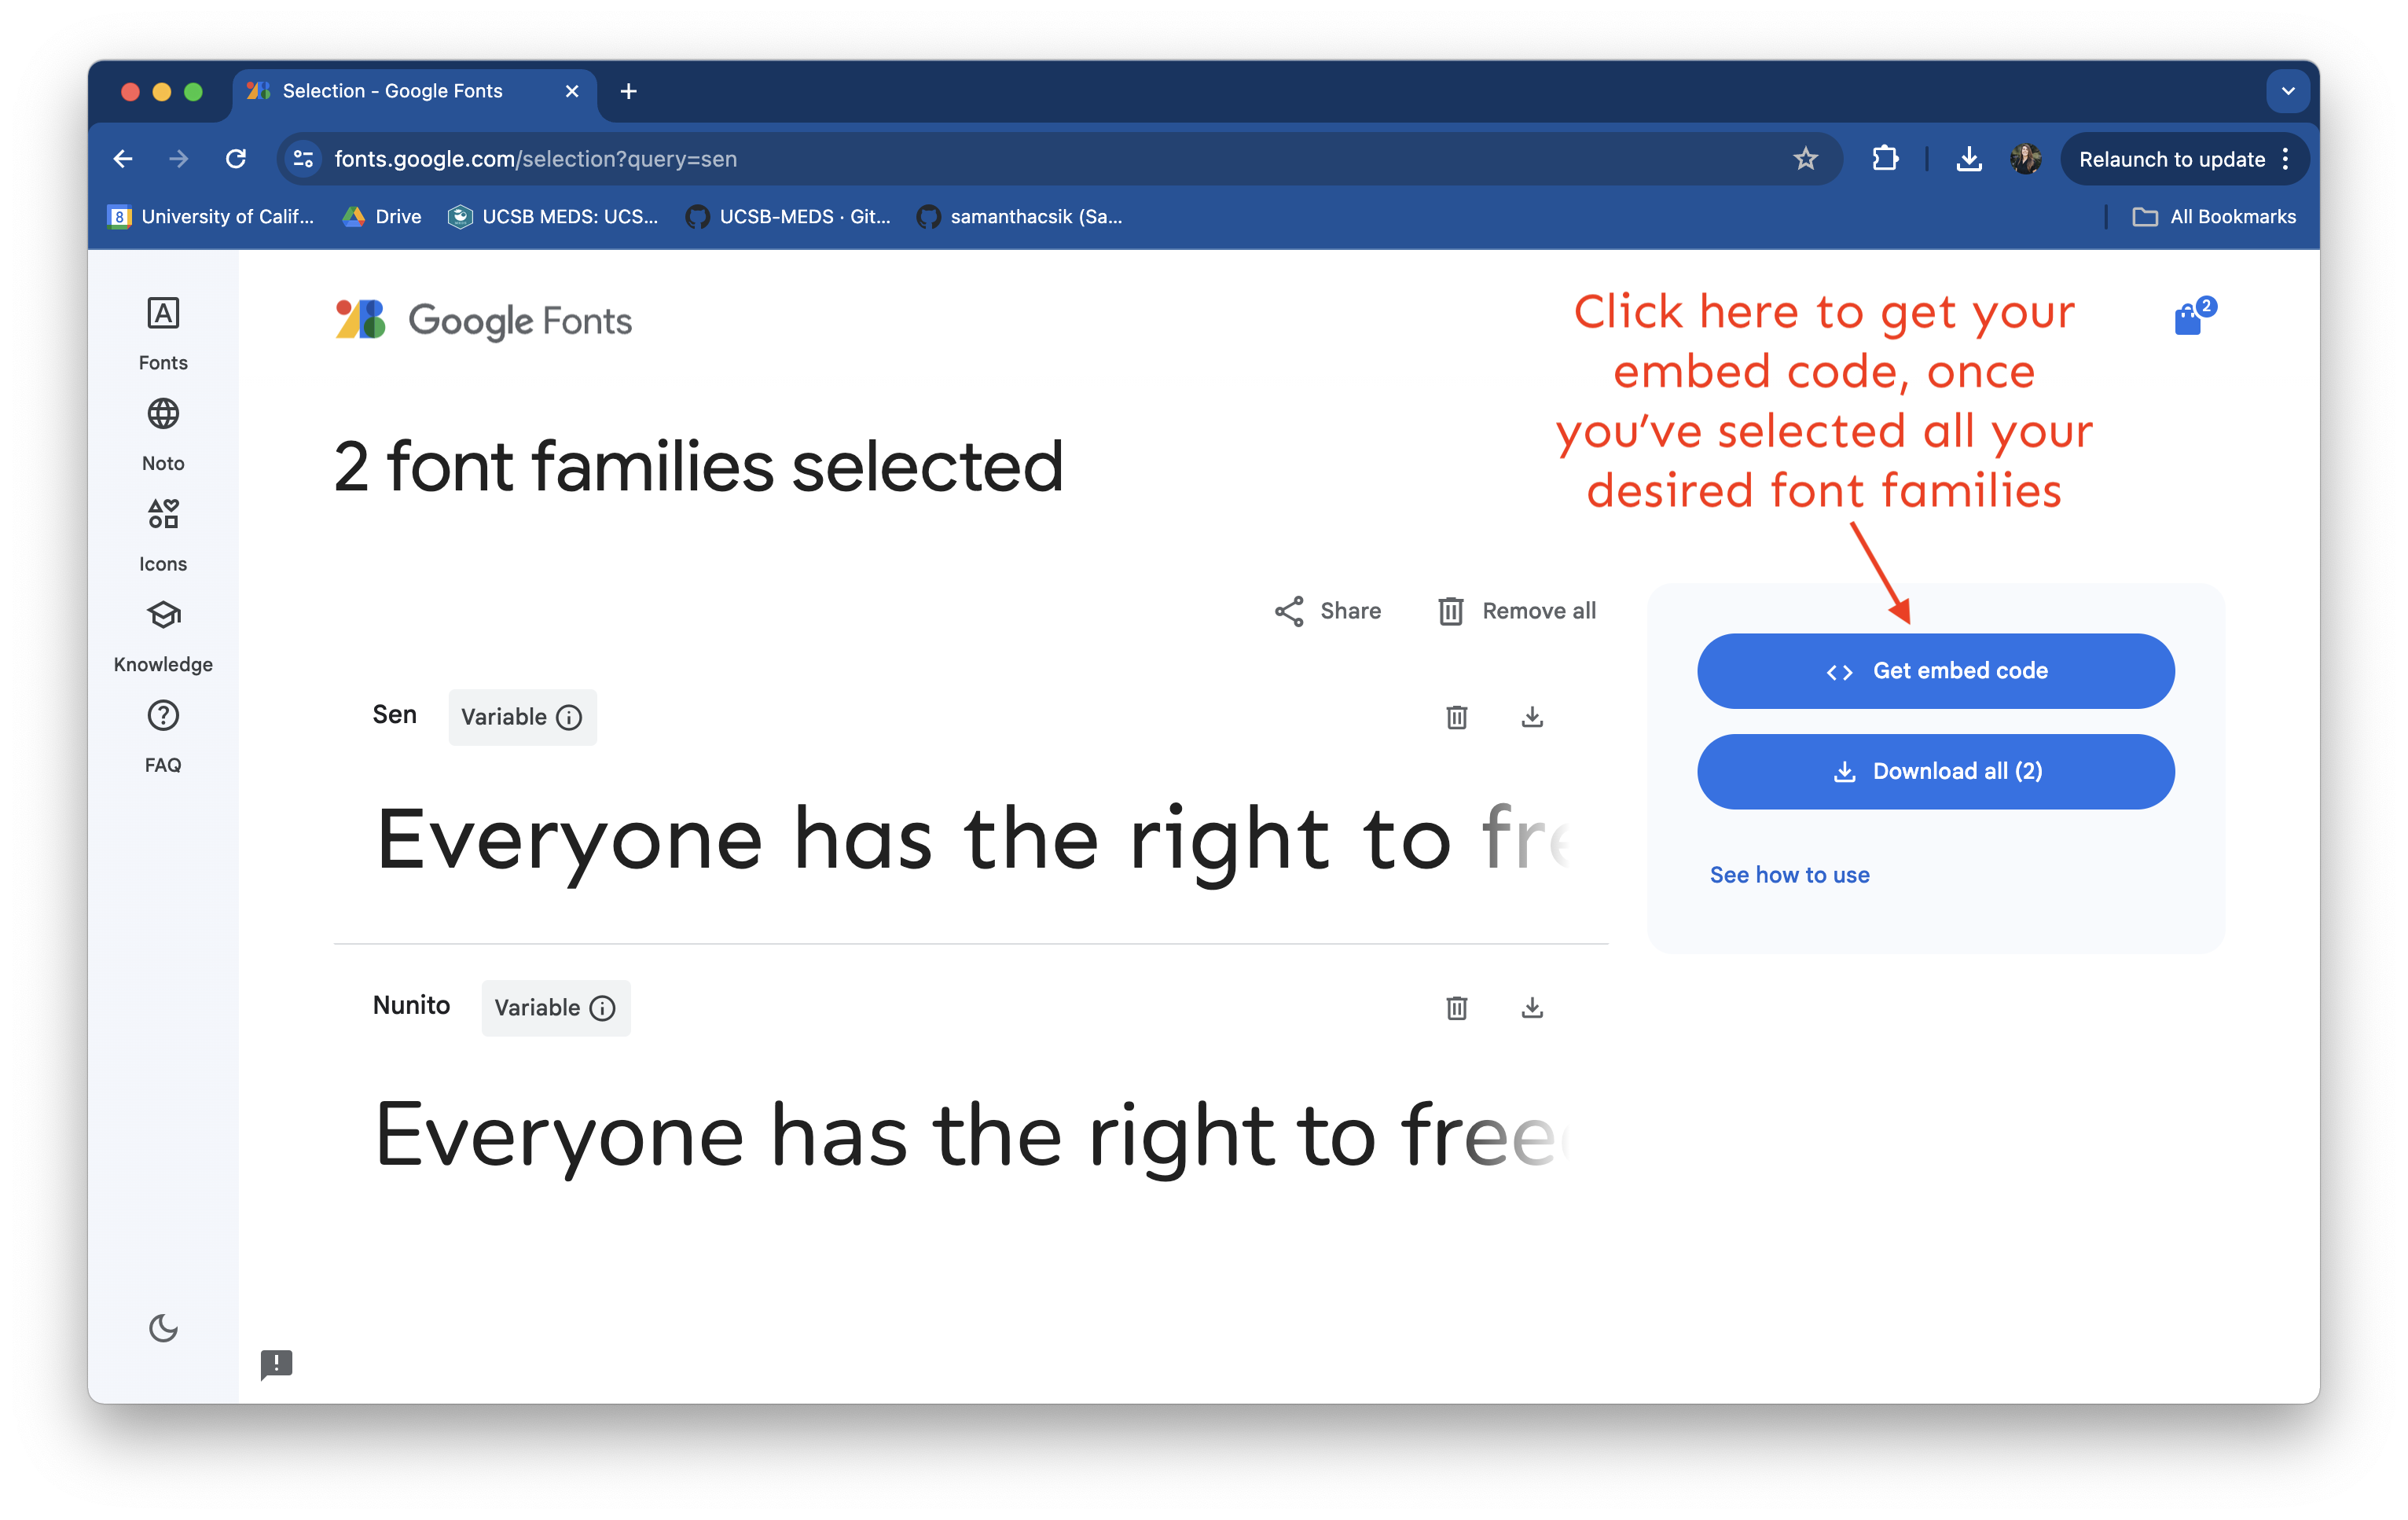
View all of your selected font families and get your embed code from your shopping bag:
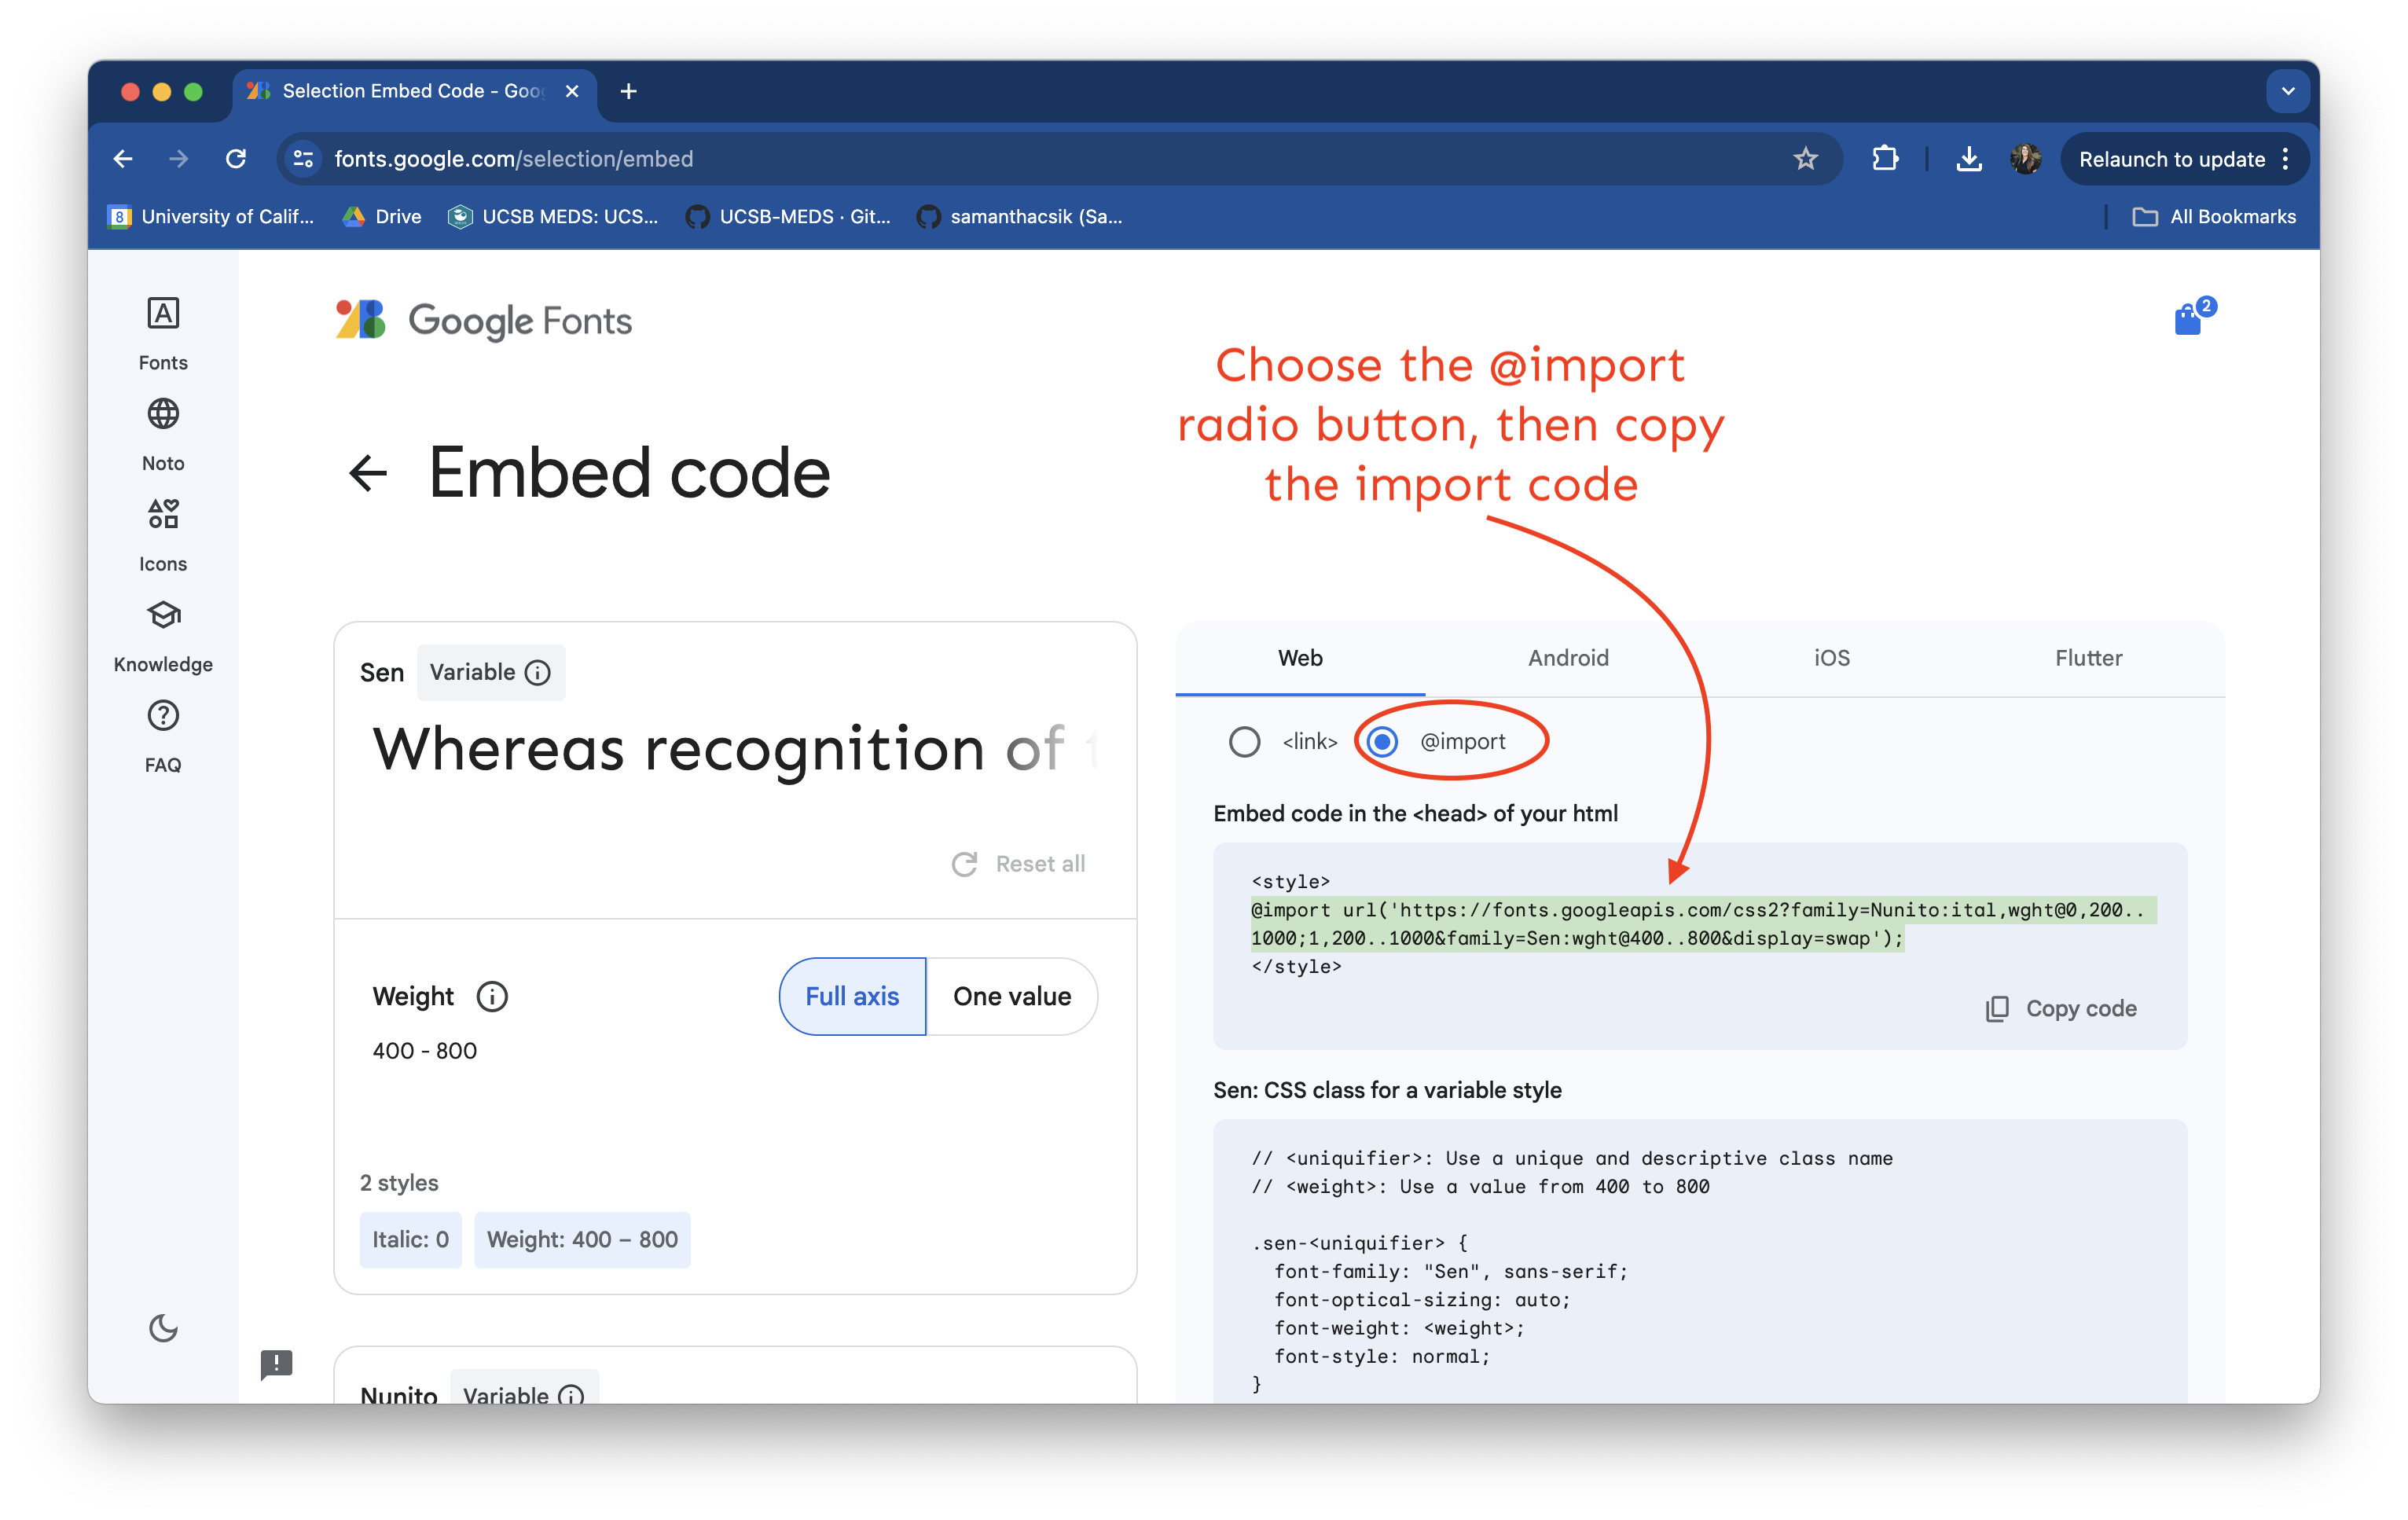
Select Fonts
Click Get embed code, then choose the @import radio button (beneath the Web menu option), which will provide your import code chunk. Copy everything between the <style> </style> tags (starting with @import and ending with ;) to your clipboard.
Select Fonts
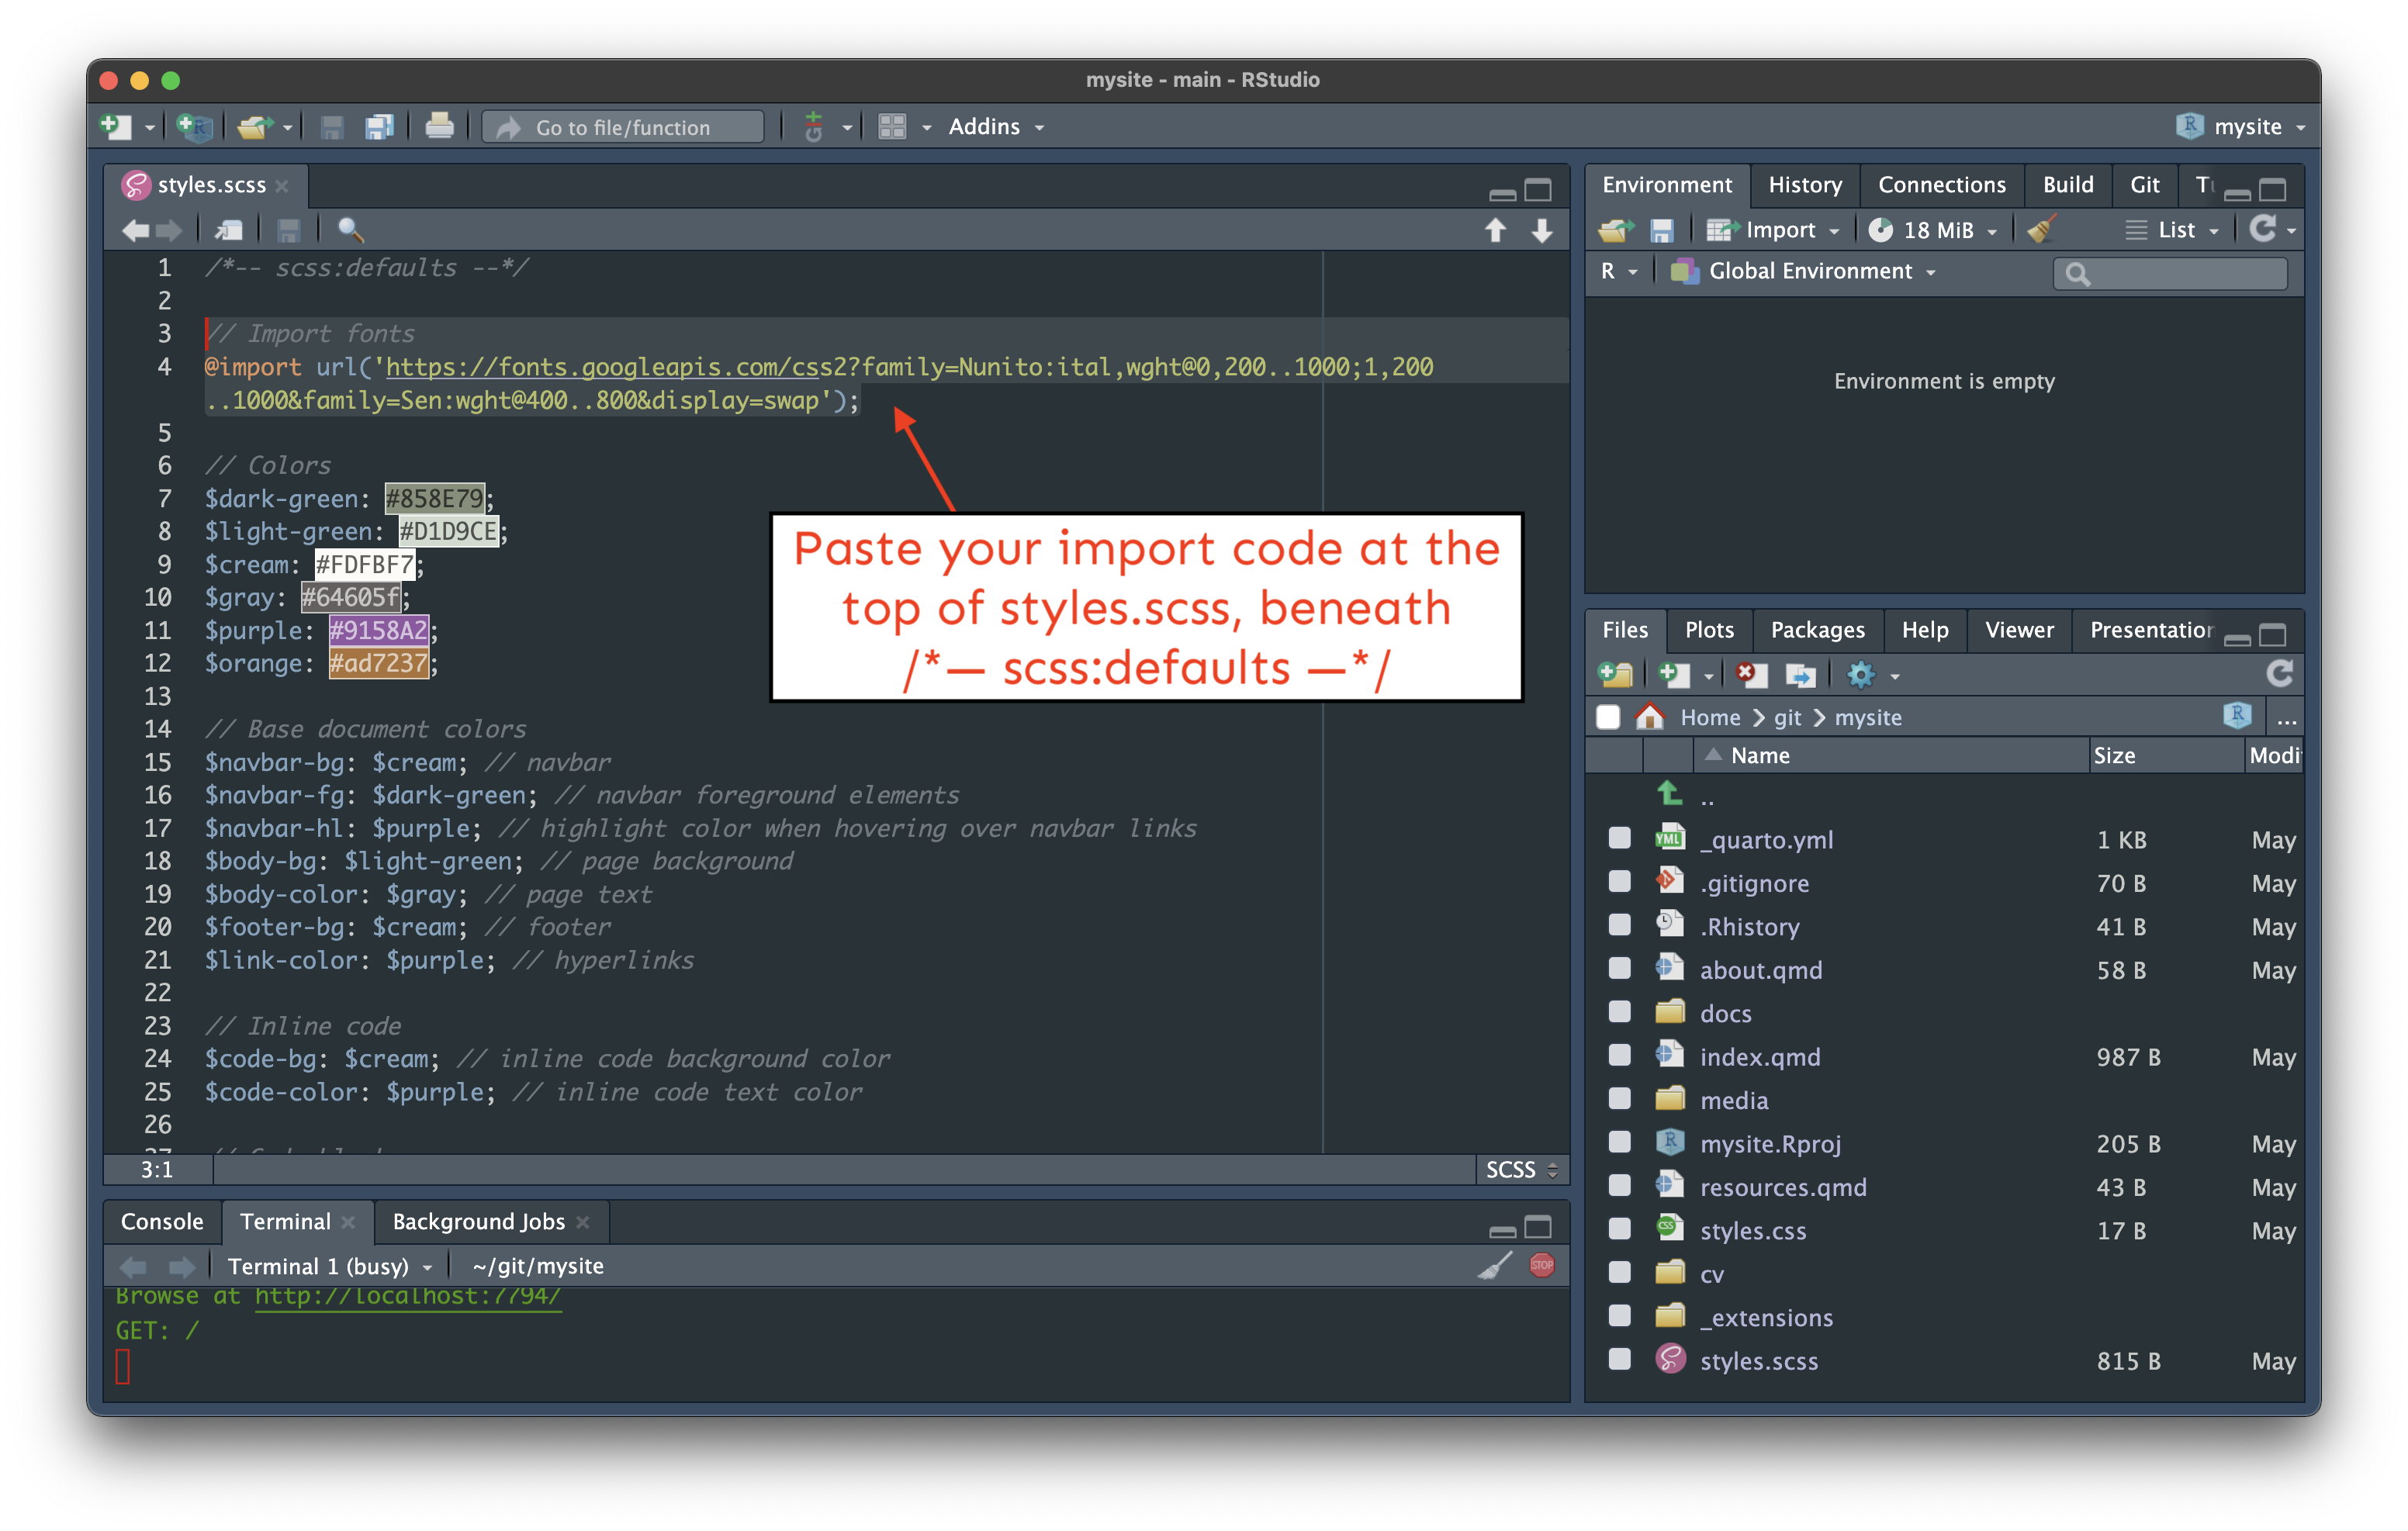
Paste the import code into styles.scss (I always place this at the top of my stylesheet, beneath /*-- scss:defaults --*/).
Select Fonts (gif)
If you’re like me, you might find a gif of the whole process helpful:
Import fonts
Your styles.scss should now similar to this:
styles.scss
/*-- scss:defaults --*/// Import Google fonts@importurl('https://fonts.googleapis.com/css2?family=Nunito:ital,wght@0,200..1000;1,200..1000&family=Sen:wght@400..800&display=swap');// Colors$dark-green: #858E79;$light-green: #D1D9CE;$cream: #FDFBF7;$gray: #64605f;$purple: #9158A2;$orange: #ad7237;// Base document colors$navbar-bg: $cream; // navbar$navbar-fg: $dark-green; // navbar foreground elements$navbar-hl: $purple; // highlight color when hovering over navbar links$body-bg: $light-green; // page background $body-color: $gray; // page text $footer-bg: $cream; // footer $link-color: $purple; // hyperlinks // Inline code$code-bg: $cream; // inline code background color$code-color: $purple; // inline code text color// Code blocks$code-block-bg: $cream; // code block background color
Set mainfont
The easiest way to apply a main (i.e. default) font for all text elements on your website is in _quarto.yml using the mainfont option:
_quarto.yml
format:html:theme:- cosmo- styles.scssmainfont: Nunitotoc:truepage-layout: full
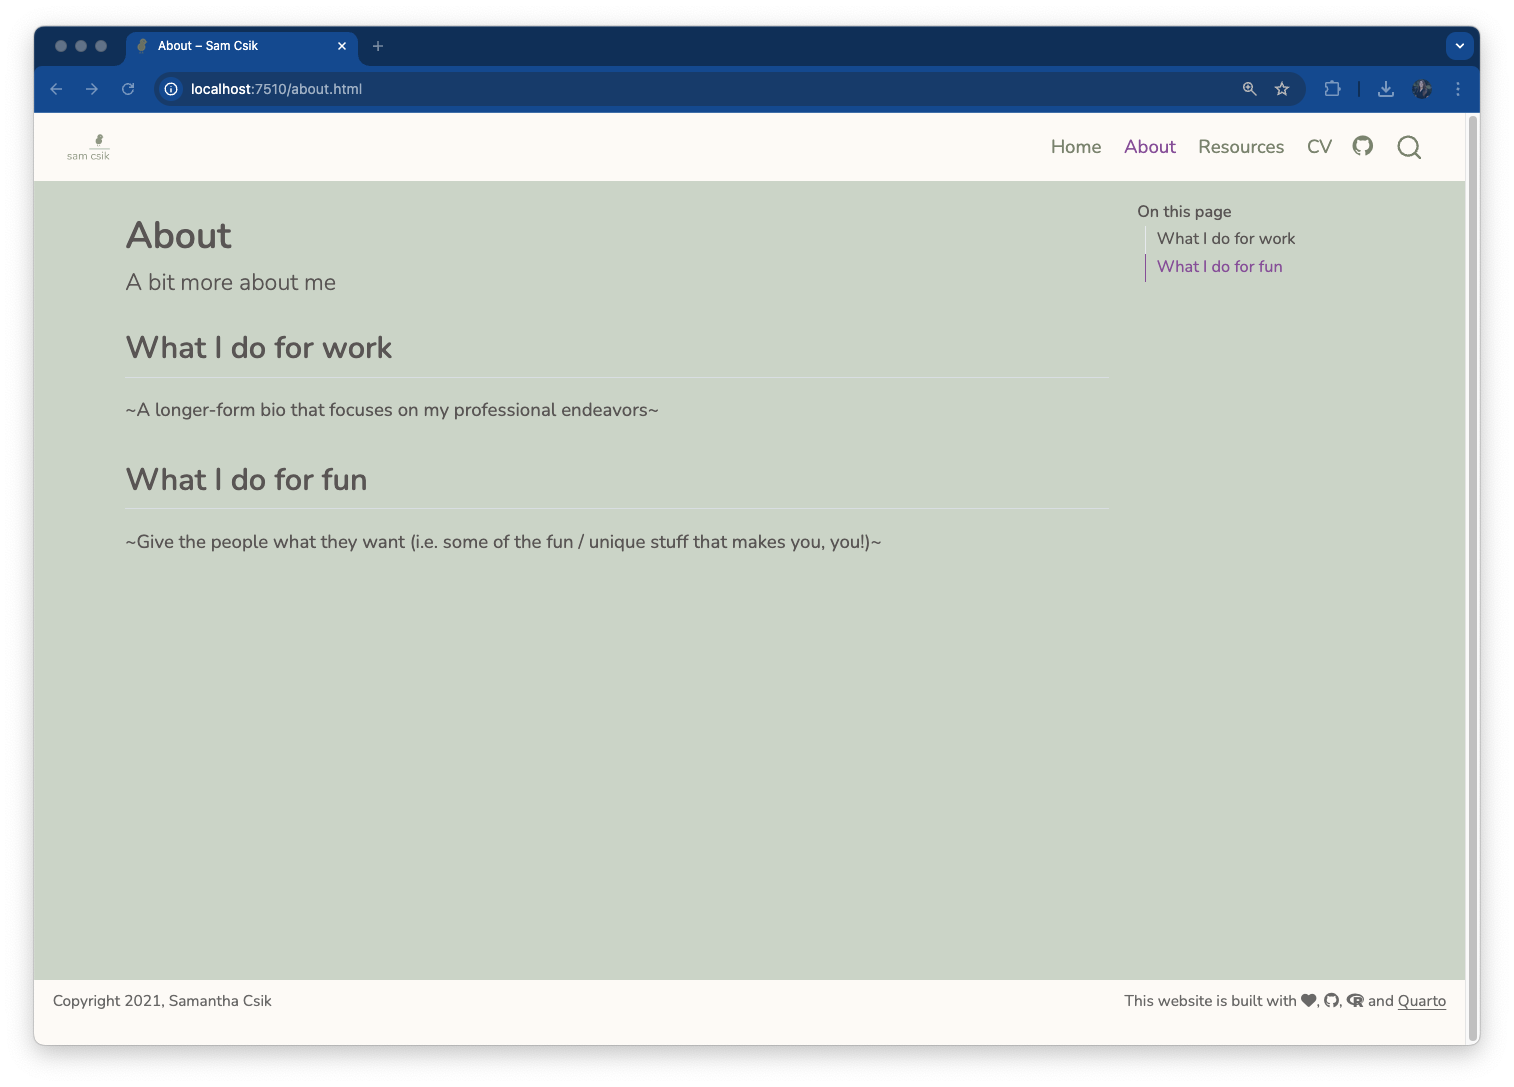
All text elements on our website are now Nunito
Apply other fonts?
Cool, but what about applying our second font, Sen?
Great question, and hang tight! This requires some CSS, which is the perfect segue into our next section.
Apply other fonts?
If you plan to use multiple fonts, you can create Sass variables for each font type, then use those variables as you construct your CSS rules. For example, this slide deck uses three fonts (Sanchez, Montserrat, and Roboto Mono):
You must import a higher font weight (e.g. 800), in addition to your standard “regular” weight, if you wish to bold text – even bolding text using markdown syntax (e.g. **this text is bold**) will not work unless a higher font weight style is imported).
Click Get embed code, then choose the @import radio button and copy everything between the <style> </style> tags;
Paste the import code into styles.scss
Apply it as a main font for all text elements on your website is in _quarto.yml using the mainfont option.
05:00
CSS + Quarto
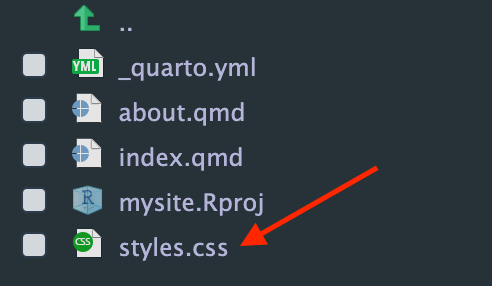
Quarto comes with styles.css
A styles.css file is automatically generated when you create a Quarto site.
We can write our CSS rules in styles.css, but alternatively, we can write them directly in our styles.scss file (remember, you can write CSS in a .scss file but you can’t write Sass in a .css file).
You can delete styles.css if you don’t plan to use it, or leave it be (it won’t impact your Quarto site since it’s not linked as our stylesheet in _quarto.yml).
SCSS Rules Divider
To start defining CSS rules in styles.scss you first need to add the /*-- scss:rules --*/ region decorator beneath your Sass variables section (this is important! your CSS won’t be recognized without this region decorator in place):
Next, we’ll walk through some examples of how to modify your site with your own CSS rules.
Write a <h1> and <h2> grouping selector
styles.scss
/*-- scss:rules --*/h1, h2 {letter-spacing: 5px;font-weight: 800; // Google fonts tells you which weights your chosen font family allows for!}
Note: We don’t need to make any changes to the HTML (in about.qmd and resources.qmd) since this grouping selector targets all <h1> and <h2> elements across the site. If an element on any of the pages has either of those tags, it will get styled according to the declaration(s) included in our CSS rule.
Preview grouping selector
Our updated <h1> and <h2> elements should now look something like this:
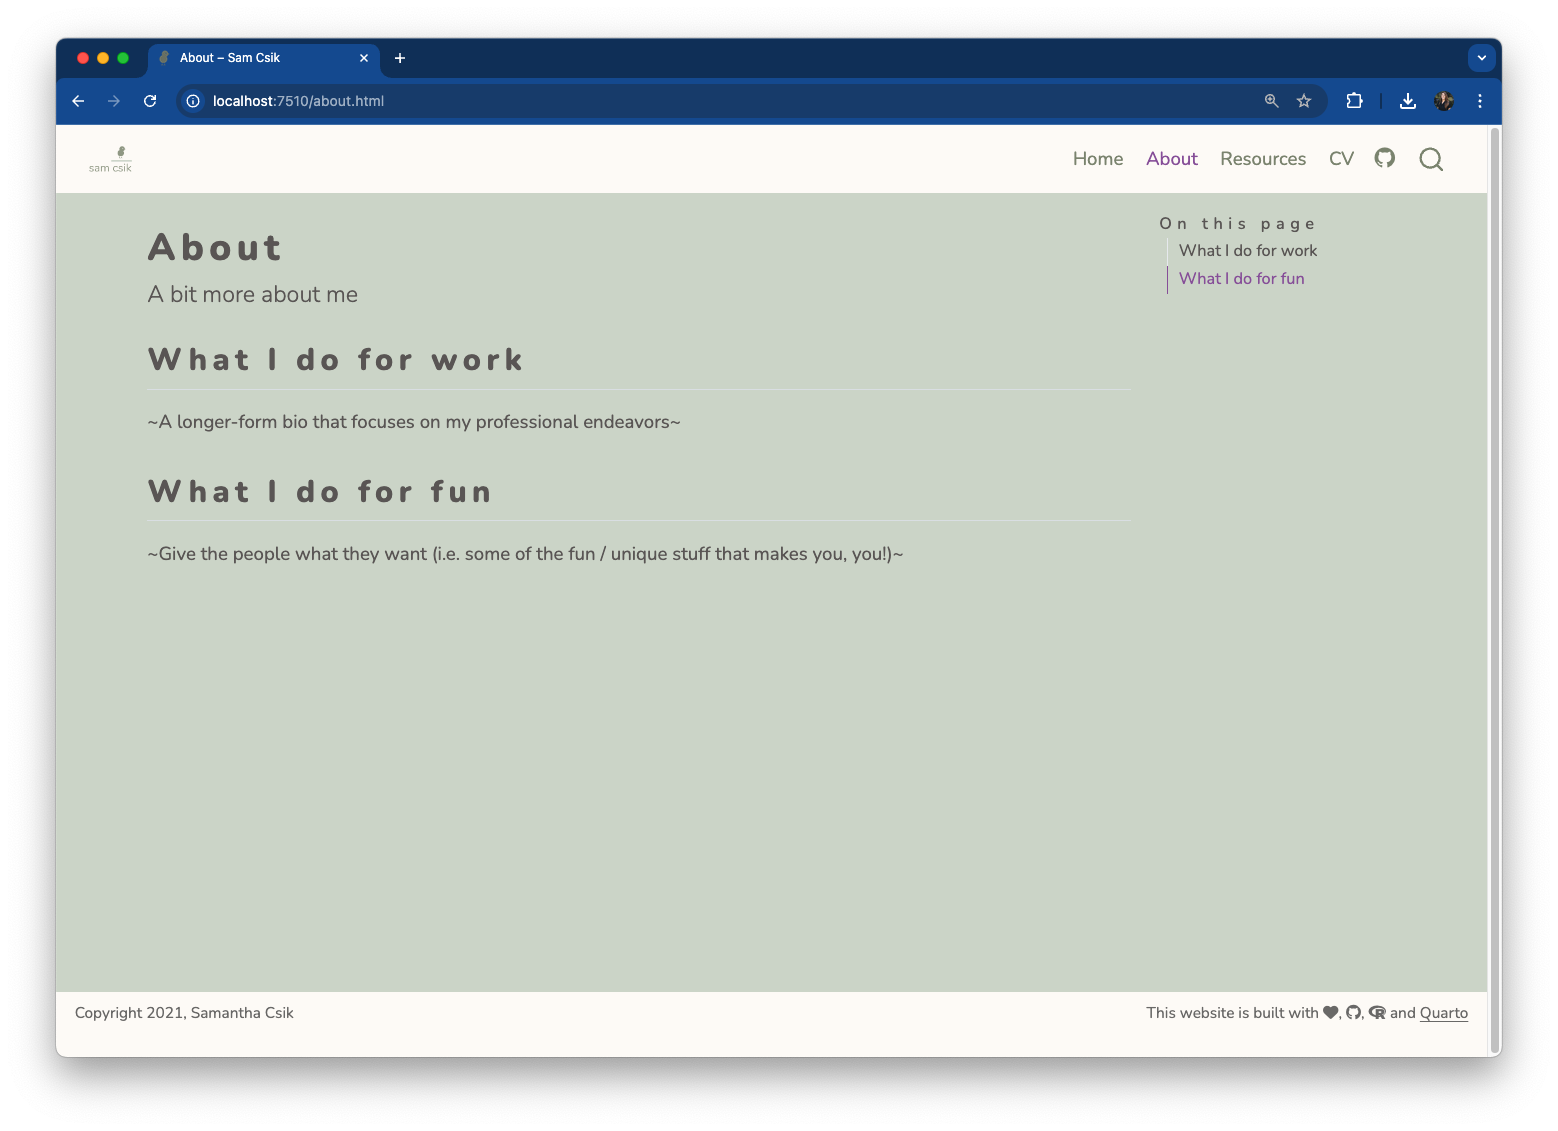
No CSS styling on h1 and h2 headers
With CSS styling on h1 and h2 headers
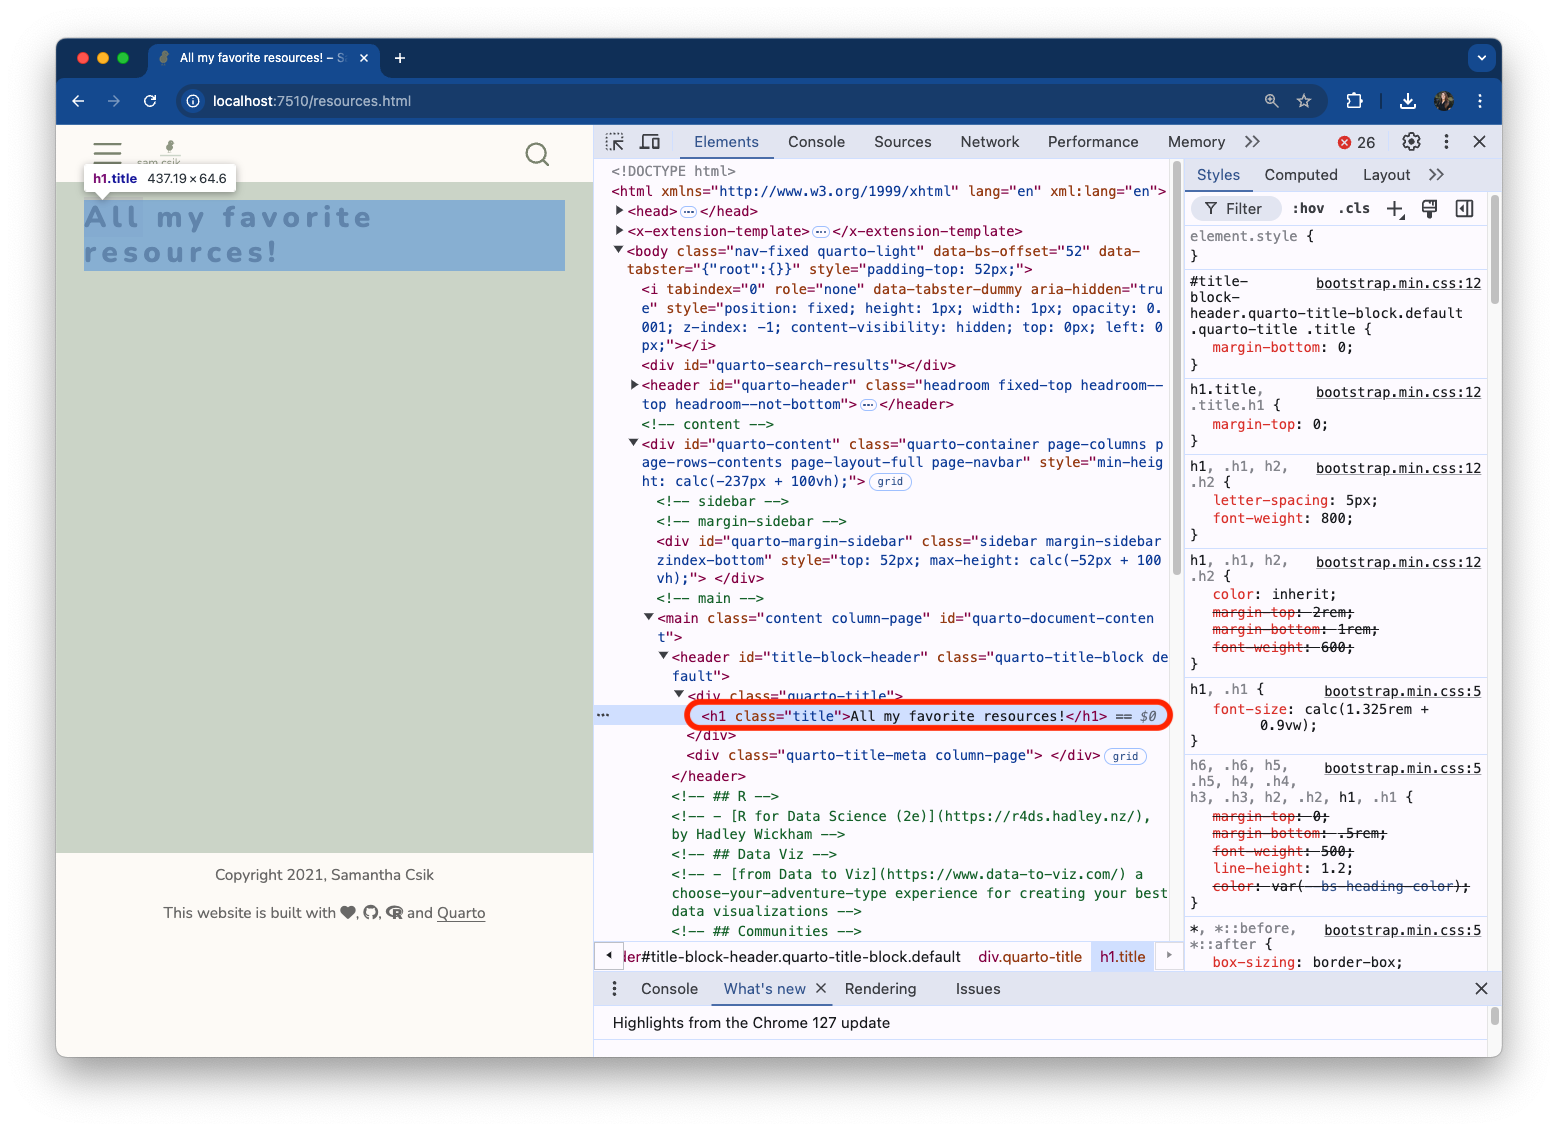
Predefined ‘title’ class
All <h1> elements are also given the class, title (e.g. <h1> class="title">All of my favorite resources!</h1>). This means that the Quarto framework has already defined a class selector called .title and applied that class to the above elements.
Predefined ‘title’ class
Modify ‘title’ class
We can modify existing class (or ID) selectors
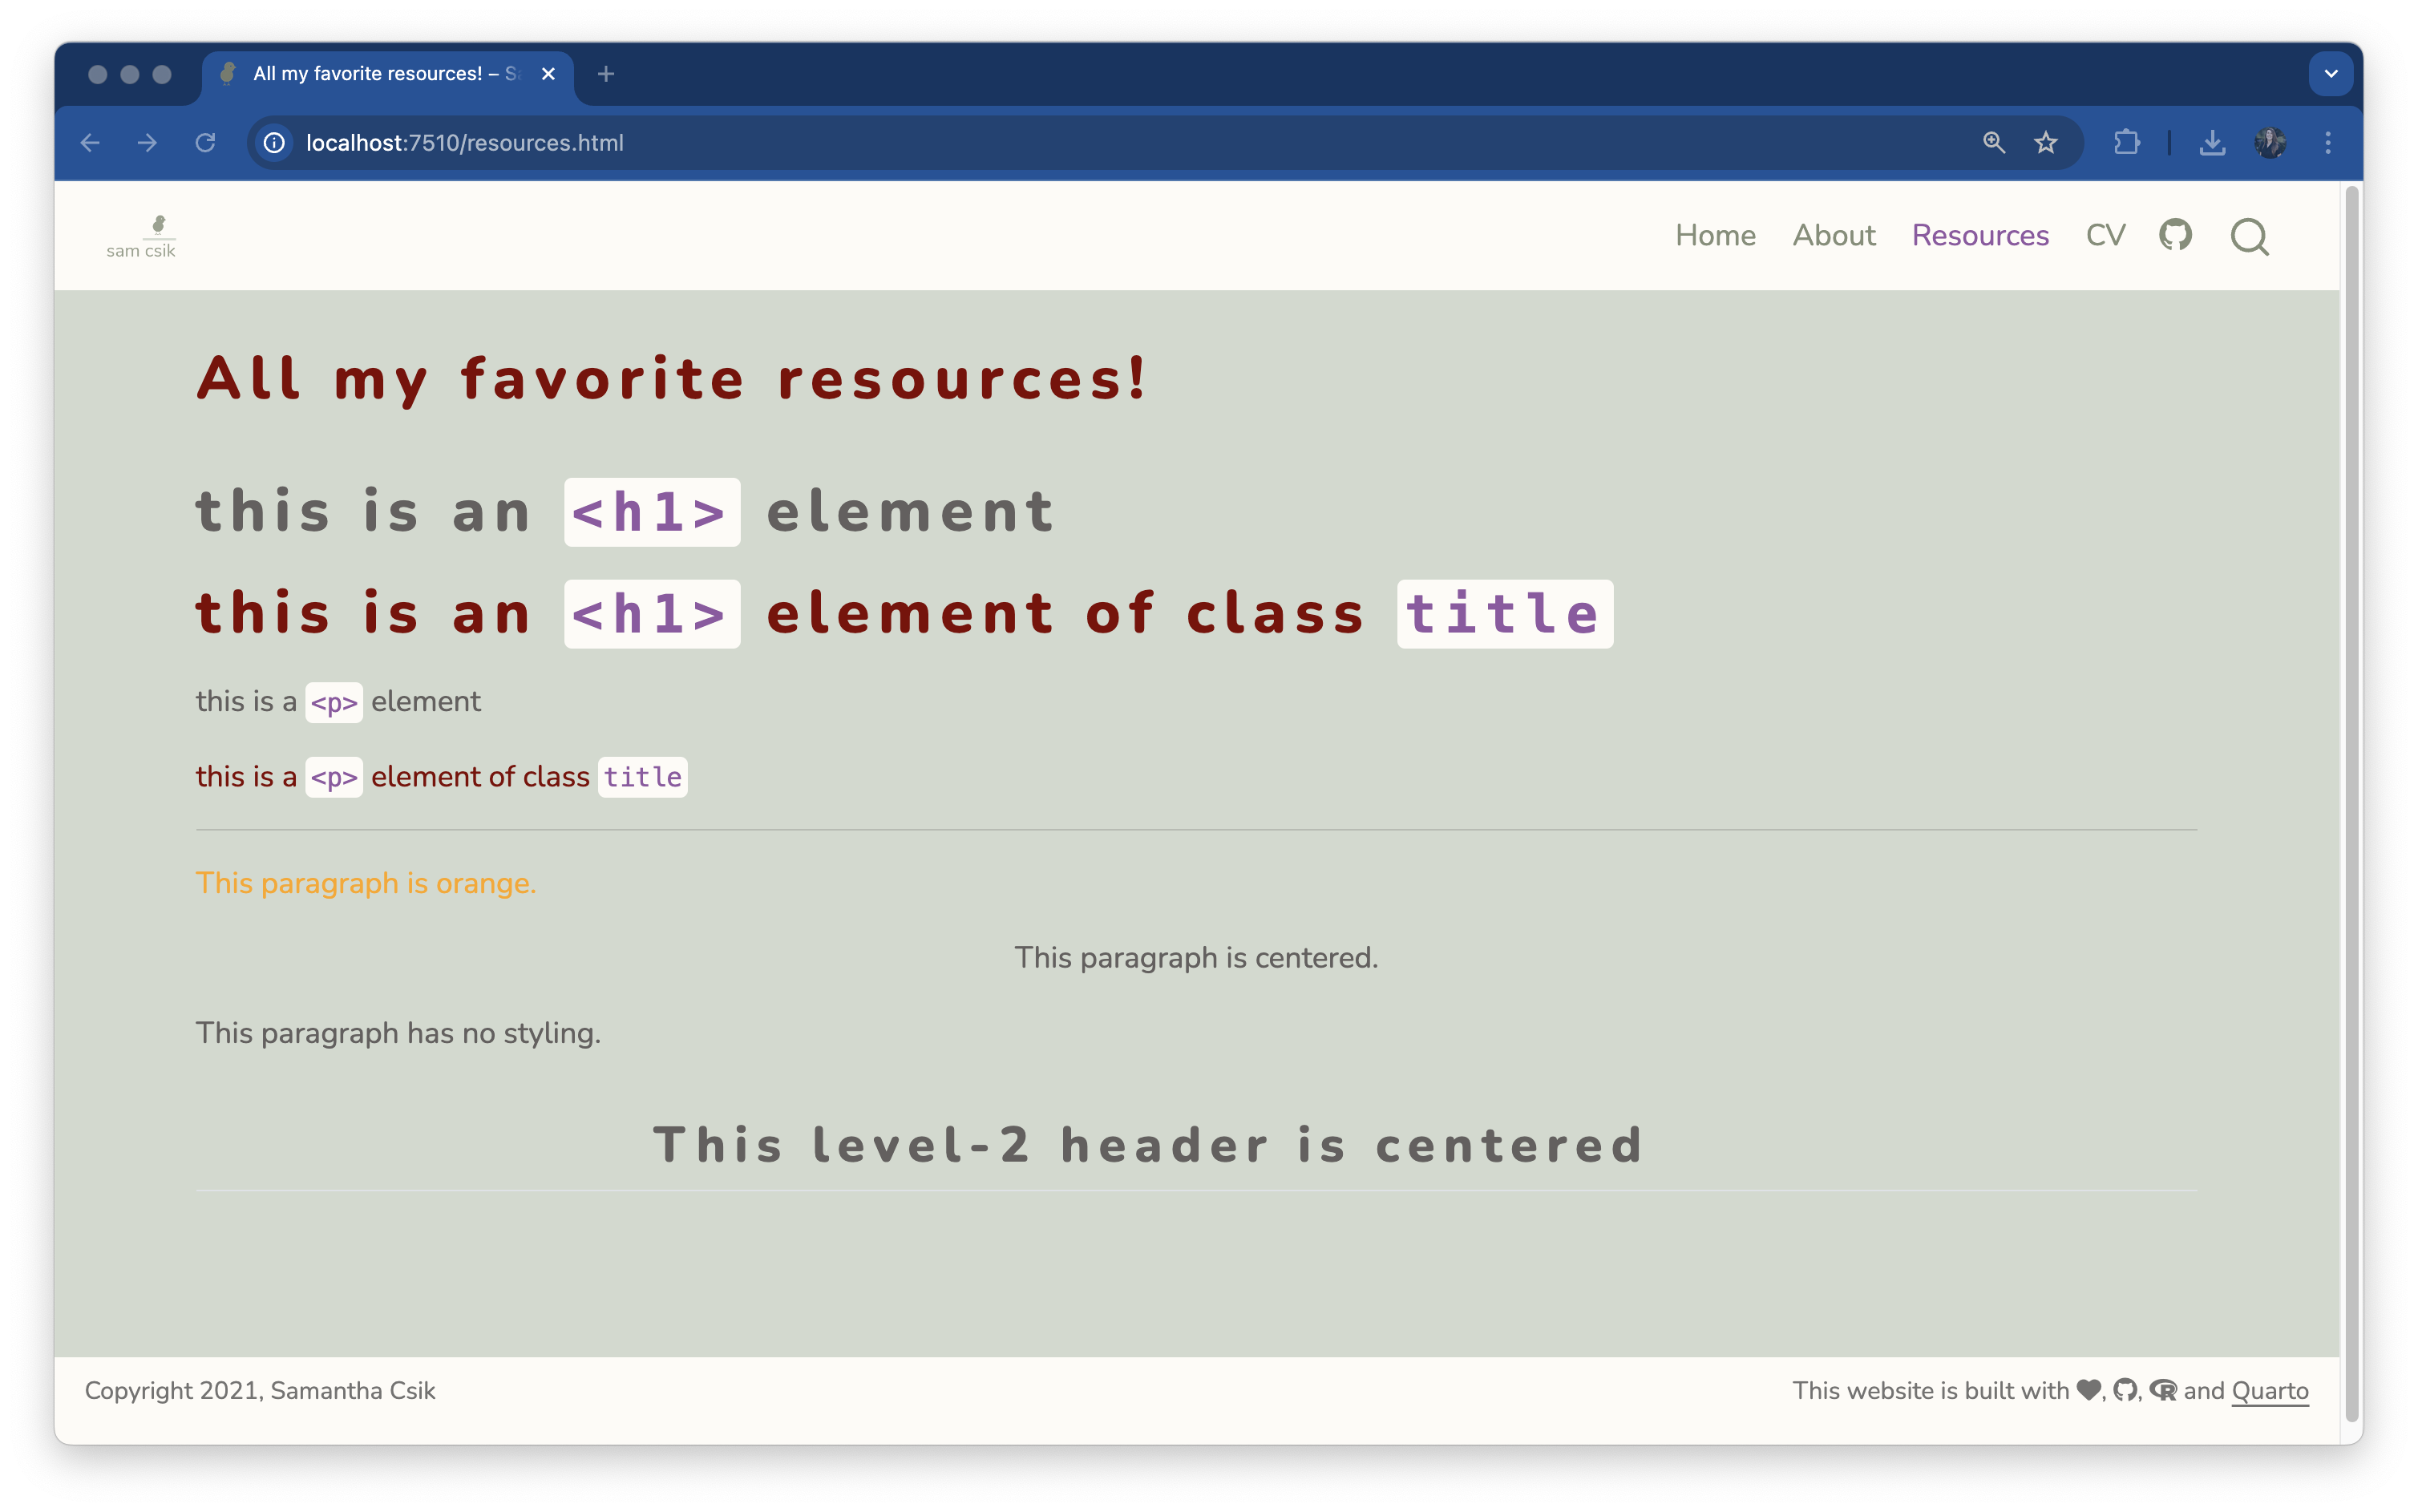
For example, let’s make any text elements that are assigned the class, .title, the color maroon:
---title: "All my favorite resources!"---<h1>this is an `<h1>` element</h1> <h1 class="title">this is an `<h1>` element of class `title`</h1><p>this is a `<p>` element</p><p class="title">this is a `<p>` element of class `title`</p>--- # three dashes is markdown syntax for creating a horizontal line across your page<p class="orange-text">This paragraph is orange.</p><p class="center-text">This paragraph is centered.</p><p>This paragraph has no styling.</p><h2 class="center-text">This level-2 header is centered</h2>
Oranged / centered text
Quarto Syntax
Quarto also provides its own syntax for applying classes to elements
You can create both divs (block-level regions of content) and spans (inline content) using Quarto’s syntax. For example:
Divs
# Quarto syntax::: {.my-selector}Some element (e.g. text) to style:::# HTML syntax<div class="my-selector"> Some element (e.g. text) to style</div>
Spans
# Quarto syntaxSome text with just [this section]{.my-selector} styled# HTML syntax<p>Some text with just <span class="my-selector">this section</span> styled</p>
Mix & match styles
You can mix and match syntaxes in .qmd files
An example:
resources.qmd
---title: "All my favorite resources!"---<p class="orange-text">Here is some orange text.</p><p>And here is some normal text beneath it.</p>[Here is more orange text written using Quarto's syntax]{.orange-text}
Resize logo
Let’s add a CSS rule to increase the size of our logo. Be sure to add this rule beneath your /*-- scss:rules --*/ region decorator, and note that you may need to adjust the max-height value to best suit your own personal logo: