05:00
Lecture 9: Python in your Project Pages
BAA1028 - Workflow & Data Management
Damien Dupré
Setting Up Python for Quarto
Why Do We Need Python?
Today we will use Quarto to run active Python code directly in our project pages.
For this to work, Quarto needs to find a working Python installation on your computer.
Let’s make sure everything is set up before we start!
Step 1: Check if Python is Installed
Open the Terminal in VS Code and type:
macOS
If Python is installed, you will see something like Python 3.12.1. If not, you will see command not found.
Step 2: Install Python if Missing
macOS
Option 1: Download from python.org:
- Go to python.org and download the latest version
- Run the installer package
Option 2: Using Homebrew:
Windows
Option 1: Download from python.org:
- Go to python.org and download the latest version
- Important: Check the box “Add Python to PATH”
Option 2: Using the Microsoft Store:
- Search for “Python” in the Microsoft Store and install it
Step 3: Check That Quarto Finds Python
Run the following command in the Terminal:
This will display a diagnostic report. Look for the Python section:
If you see checkmarks, Python is correctly configured. If you see crosses, revisit the previous steps.
If Quarto Still Cannot Find Python
If Python is installed but Quarto cannot find it, you need to tell Quarto where to look.
Find Python’s path:
macOS
Returns something like /usr/local/bin/python3 or /opt/homebrew/bin/python3.
Windows
Returns something like C:\Users\YourName\AppData\Local\Programs\Python\Python312\python.exe.
If Quarto Still Cannot Find Python (continued)
Set the path in your terminal before rendering:
macOS
Windows (PowerShell)
Install Required Python Packages
Even with Python found, you might get errors about missing packages like jupyter or plotly:
Debugging Summary
| Problem | Solution |
|---|---|
Python 3 not found |
Install Python from python.org |
| Python installed but Quarto can’t find it | Set QUARTO_PYTHON environment variable |
No module named jupyter |
Run pip install jupyter |
| Not sure what’s wrong | Run quarto check to diagnose |
Your Turn
Let’s make sure everyone is ready before we continue!
- Open the Terminal in VS Code
- Run
python --versionand check that Python is installed - Run
quarto checkand verify that the Python section shows checkmarks - If Python is missing, install it from python.org and run
quarto checkagain - Run
pip install jupyter plotly pandas
Before we proceed…
Start again from scratch!
You have made incredible progress with your eportfolio but you should not mess it up. Let’s practice on a fresh website!
In the terminal of VS Code type:
Today, we will learn how to add code to project pages.
Project Pages
Project Pages on your website will serve as dedicated sections showcasing specific projects or topics.
Some pages will focus on academic or personal, non-coding projects, such as group work or volunteer experiences, using only Markdown and illustrative content.
Project Pages
Others will feature coding projects, incorporating both Markdown and code snippets within your Quarto pages.
Today’s lecture will concentrate on integrating code into your Project Pages effectively.
Non Active Code Chunks
Source Code
Use ``` to delimit blocks of source code:
Source Code
Add a language to syntax highlight code blocks
Source Code
Markdown supports syntax highlighting for over 140 different languages.
If your language is not supported then you can use the default language to get a similar visual treatment:
Source Code
Equivalent to the short form used in the examples above is a longer form that uses the language as a class (i.e. .python) inside braces
Source Code
The longer form allows you to add attributes to the block in a similar way to Divs. Some specific features that use this syntax are Lines Numbers and Code Filename.
Here is an example of the latter:
If you are creating HTML output there is a wide variety of options available for code block output. See the article on HTML Code for additional details.
Your Turn
Write a project page which only includes non active code to describe how to read a csv file, select some columns, and filter some values with the pandas library in python.
- Create a
.qmddocument in your new website - Generate a tutorial to use the
pandaslibrary in python - Organise this tutorial in your
.qmddocument to display non-active python code
05:00
Active Code Chunks
Active Code Chunks
Instead of just showing the code in a fancy way, Quarto can also run the code from the code chunks and print out their outputs.
In stand alone Quarto document you would specify the engine: python3 argument in your YAML but in a website, there is no action to take beside including “Active” code cells/chunks.
An “Active” python code cells/chunks uses ```{python} to start the cells/chunks and ``` to finish it.
Active Code Chunks
What you write:
What you see:
Anatomy of a Code Cell
Place options underneath, behind the #| (hashpipe): #| option1: value
Cells output can be customized with this hashpipe options (i.e., arguments set after the #|). Above, we use 1 argument:
See the Quarto Reference Guide for a complete list of chunk options.
Figures in the Output Document
As long as an object is created in the first chunk, then a visualisation can be used in a separated cell:
Visualisation Specific Options
Some cell options are specific to visualisations outputs:
- fig-cap: “caption of the figure”
- fig-height: 5
- fig-width: 5
Note, the default unit for height and width is inches.
Your Turn
In your tutorial to use the pandas library in python, turn all the non active code cells/chunks into active code.
05:00
Your Turn
Write a second project page which describes how to do a linear regression in python.
This project page should include some python visualisations.
Add hashpipe options to change the output of these visualisations.
05:00
General Code Options
General Code Options
Some options specified for each code cell/chunk with a hashpipe can also been set globally for the whole document in the YAML
Instead of:
General Code Options
The option code-line-numbers:true or code-line-numbers:false includes or hiddes line numbers in code block output
Instead of:
General Code Options
For example, the option code-fold: true collapses the code into an HTML “details” tag so the user can display it on-demand.
Code
General Code Options
You can include a Code menu in the header of your document that provides various tools for readers to interact with the source code. Specify code-tools: true to activate these tools:
General Code Options
If you have a document that includes folded code blocks then the Code menu will present options to show and hide the folded code as well as view the full source code of the document:
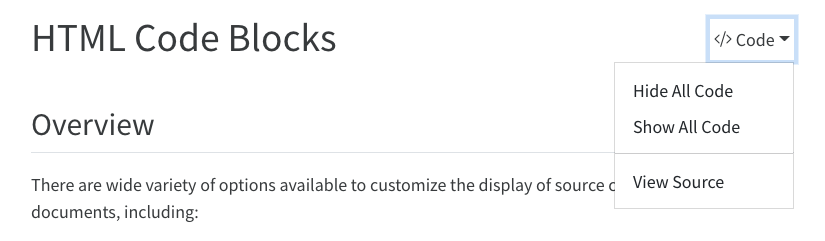
This document specifies code-tools: true in its options so you should see the Code menu above next to the main header.
General Code Options
You can control which of these options are made available as well as the “Code” caption text using sub-options of code-tools.
For example, here we specify that we want only “View Source” (no toggling of code visibility) and no caption on the code menu:
Note that the code-tools option is not available when you disable the standard HTML theme (e.g. if you specify the theme: none option).
Appearance
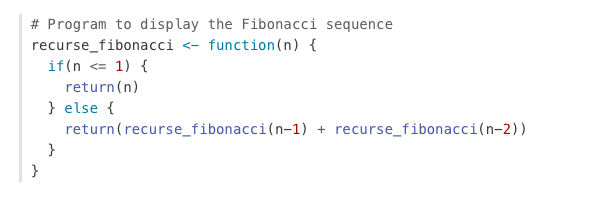
By default code blocks are rendered with a left border whose color is derived from the current theme.
You can customize code chunk appearance with some simple options that control the background color and left border. Options can either be booleans to enable or disable the treatment or can be legal CSS color strings (or they could even be SASS variable names!).
Appearance
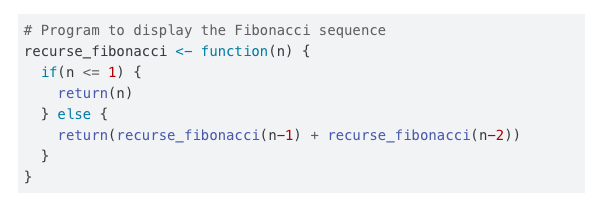
Here is the default appearance for code blocks (code-block-background: true):
Appearance
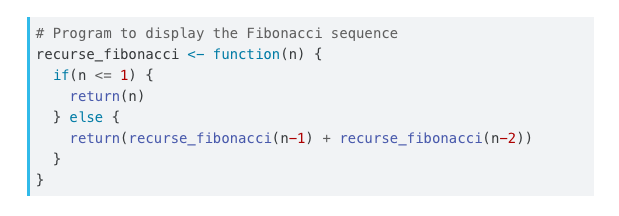
You can combine a background and border treatment as well as customize the left border color:
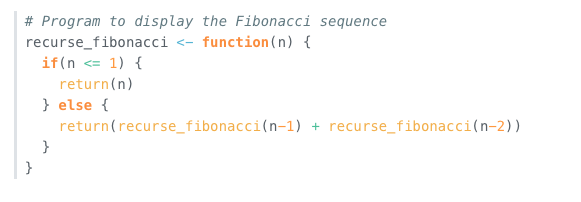
Highlighting
Quarto will automatically highlight syntax in fenced code blocks that are marked with a language name.
For example:
You can specify the code highlighting style using highlight-style and specifying one of the supported themes. These themes are “adaptive”, which means they will automatically switch between a dark and light mode based upon the theme of the website.
Highlighting
These are designed to work well with sites that include a dark and light mode.
- a11y
- arrow
- atom-one
- ayu
- breeze
- github
- gruvbox
All of the standard Quarto themes are also available:
- pygments
- tango
- espresso
- zenburn
- kate
- monochrome
- breezedark
- haddock
As well as an additional set of extended themes, including:
- dracula
- monokai
- nord
- oblivion
- printing
- radical
- solarized
- vim-dark
Highlighting
The highlight-style option determines which theme is used.
For example:
Highlighting themes can provide either a single highlighting definition or two definitions, one optimized for a light colored background and another optimized for a dark color background.
When available, Quarto will automatically select the appropriate style based upon the code chunk background color’s darkness.
By default, code is highlighted using the arrow theme, which is optimized for accessibility.
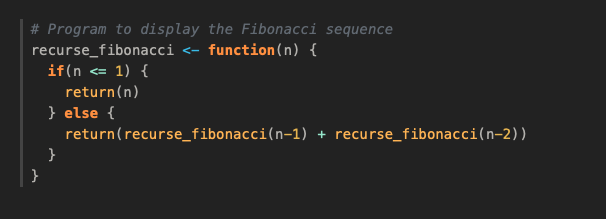
Highlighting
Examples of the light and dark themes:
Arrow (light)
![]()
Ayu (light)
Arrow (dark)
![]()
Ayu (dark)

Thanks for your attention and don’t hesitate to ask if you have any questions!
@damien_dupre
@damien-dupre
https://damien-dupre.github.io
damien.dupre@dcu.ie